Posted by Ramprasad Navaneethakrishnan on February 21, 2013
I recently started Azure development and thought maybe this post would be useful for future developers. It’s basically about setting up Windows Azure development environment for .NET
- Download and Install Windows Azure SDK.
- Download and Install NuGet package Manager. Nuget package manager is a easy way to download and reference the needed libraries to your project.
- Setup a Windows Azure account from Windows Azure Website. Microsoft provides 90 day free trial to use the Azure cloud resources. During the registration process, it asks for credit card details to validate the authenticity. They do not charge the card.
Assuming you have Visual Studio already installed, that’ pretty much it.
Posted in MOSS 2007 | Tagged: .Net, Cloud, Microsoft, NuGet, SDK, Visual Studio, Windows Azure | Leave a Comment »
Posted by Ramprasad Navaneethakrishnan on May 9, 2009
Over my previous posts, I was discussing about the out-of-the-box site templates and out-of-the-box webparts available in MOSS 2007. This post is dedicated to Creating Custom Web Parts in MOSS 2007.
Creating Custom Web Parts:
Let us list down the procedures involved in creating custom web parts.
- Create custom web part control in Visual Studio
- Strong name the created web part assembly
- Place the assembly in the bin directory in the Virtual Directory of the web application
- Place the assembly in the GAC
- Notedown the assembly name, version and public key token by looking into the assembly properties in the GAC
- Add a SafeControl entry for the web part assembly in the application’s web.config file
- Do IISRESET
- Create Web Part in Visual Studio
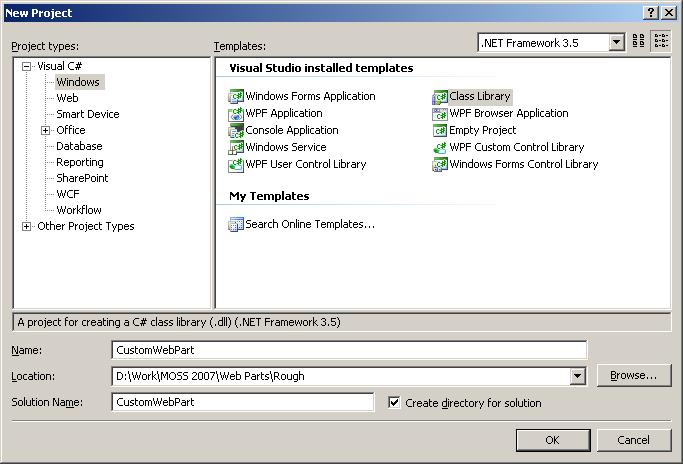
- Open Visual Studio 2005–>Create New Project–>Select Class Library project template–>Enter the project name as CustomWebpart
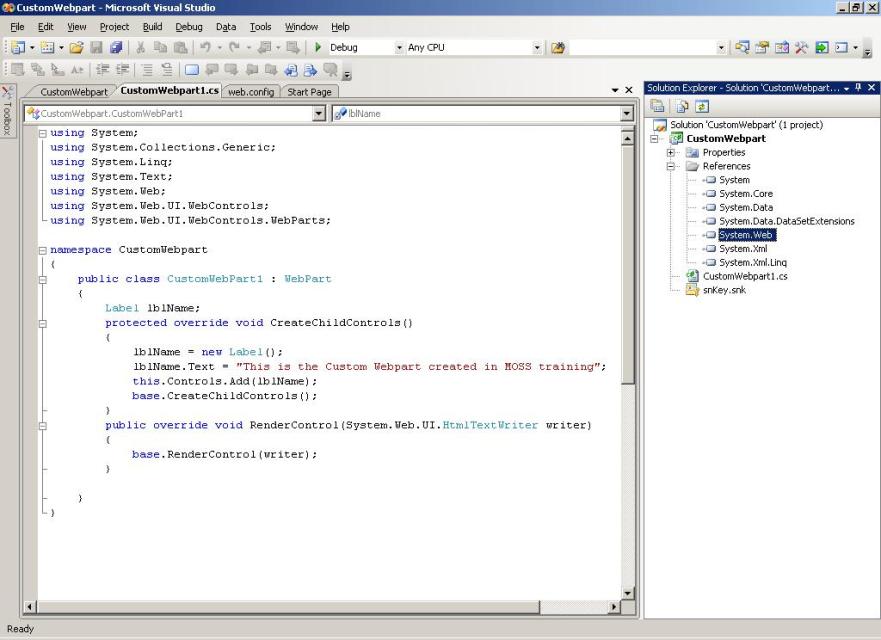
- Add Reference to System.Web dll
- Open Class1.cs. Add the following namespaces
- using System.Web;
- using System.Web.UI.WebControls;
- using System.Web.UI.WebControls.WebParts;
- Change the name of the class to CustomWebPart1. Inherit CustomWebPart1 from WebPart class (see code below)
- Override CreateChildControls and RenderControls events (see code below)
- Create a label control and assign its text property inside CreateChildControls events ( see code below)
- The code looks like the following
using System;
using System.Collections.Generic;
using System.Linq;
using System.Text;
using System.Web;
using System.Web.UI.WebControls;
using System.Web.UI.WebControls.WebParts;
namespace CustomWebpart
{
public class CustomWebPart1 : WebPart
{
Label lblName;
protected override void CreateChildControls()
{
lblName = new Label();
lblName.Text = “This is the Custom Webpart created in MOSS training”;
this.Controls.Add(lblName);
base.CreateChildControls();
}
public override void RenderControl(System.Web.UI.HtmlTextWriter writer)
{
base.RenderControl(writer);
}
}
}
- Build the solution. The assembly CustomWebpart will get created
- Strong Naming the Assembly
- Go to Project Properties page (Right click the project and select properties)
- Select Signings section. Check the ‘Sign the assembly’ checkbox.
- Select ‘Create New’ in the ‘Choose the strong name file’ drop down box.
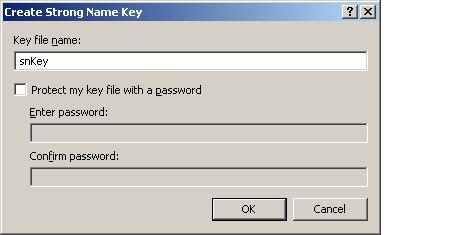
- In the dilog box enter a key name say snKey and click ok. (Uncheck the password checkbox).
- Now the assembly is strong named. Build the project.
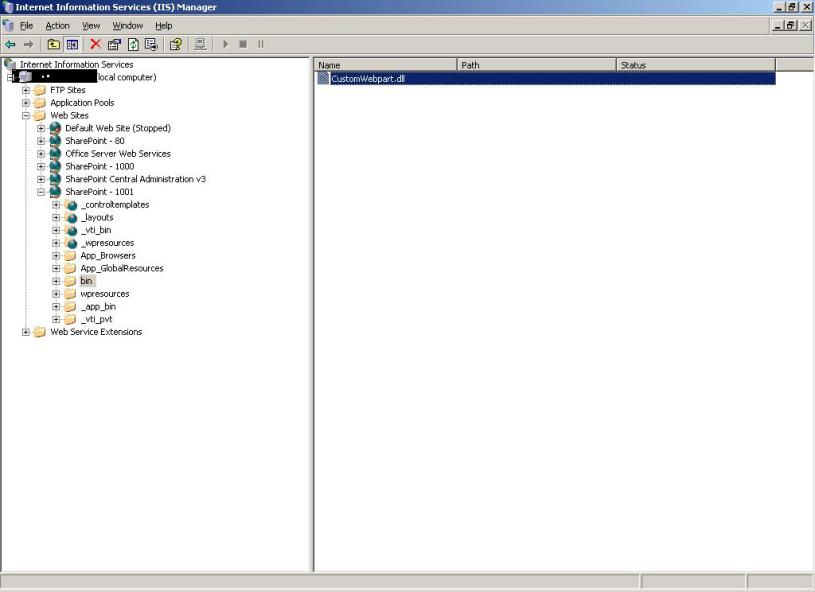
- Place the dll in the bin folder of the application’s virtual directory
- Place the dll in the GAC and note down its name and public key token
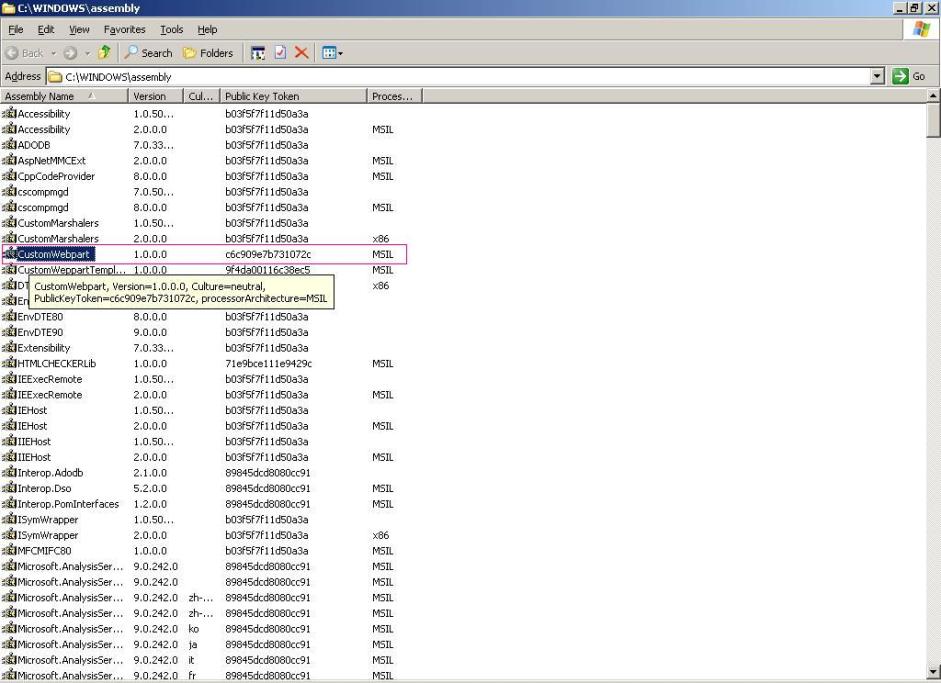
- Add the assembly as Safe Control in the application’s web.config.

- Thats all. Do an IISRESET
- Adding newly created web part to Site Collection
- Go to SiteActions –>Site Settings
- In the Galleries section choose Web Parts
- In the Web Parts gallery click on New
- In Add new web parts page, scroll through the list and select the web part you just created.
- Click on the button Import Web Part to the Gallery.
- Now, go to the page where you want to add the newly created custom web part
- SiteActions –> Edit page
- Click Add Web Part. In the Add Web Part box, select the custom web part.
- Click Ok.
- Now you can see the custom web part is added to the page.
Hope this is useful.
Please leave your comments.
Thanks
Posted in MOSS 2007 | Tagged: Add New Web Part, Class Library, Custom Web Parts, IIS, IISRESET, MOSS 2007, Safe Control, Sharepoint 2, Visual Studio, Web Part Gallery, Web Parts | 8 Comments »


